|
|
You open the box, see different cables, and your mind draws up a question mark.
But basically, it's easy to transfer digital photos to the computer. And if you're using Windows XP, then it's even easier because Windows have user-friendly menus to help you transfer photos from your digital camera.
If your computer is running Windows XP, then here's how to do it:

- First, connect your digital camera to your computer. You can do this either by USB port (available for most cameras) or docking station.
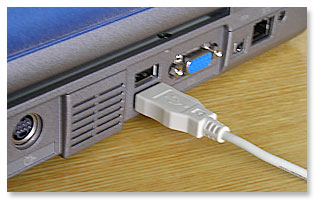
- Let's say you'll be using your USB port. Plug the USB cable to your camera, then plug the other end to your computer.
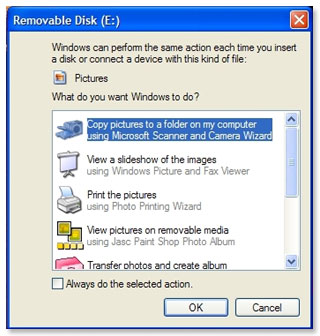
- Windows XP will detect your digital camera and a small screen pops up to show you the menu of activities you can choose from:
- For our example, let's choose the camera wizard.
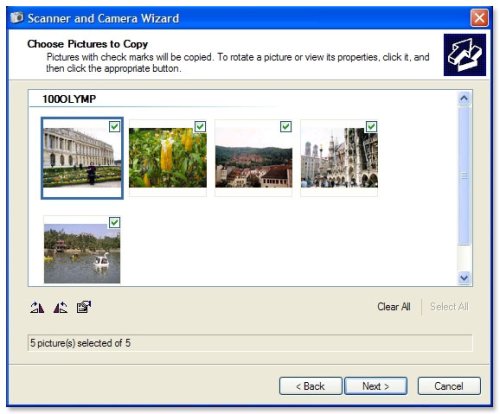
- The digital photos in your camera will be displayed. Check those you want to transfer to your computer. Then click Next.
- Type a name for this group of pictures. This will become your folder name. Then click browse to locate where you want to save this new folder. Check Delete pictures from my device after copying them if you want to clean up your memory card after transferring your digital photos.
- You now have the option of publishing your digital photos online, ordering prints, or simply viewing them onscreen. If it's the latter, click Nothing then Next. And lastly, click Finish.


Note: What if you're using a Kodak digital camera? Kodak digital cameras usually come with a docking station. You just plug the docking station to your computer, install the software, and follow the instructions either from your manual or onscreen.
Other ways to transfer your digital photos

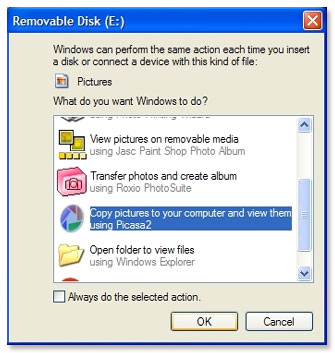
Now, look closely at the Windows menu that popped up when you connected your digital camera. You have other options for transferring your photos.
If you use a digital photo organizer, then you can select it from the menu and follow the onscreen instructions.
Unsure what a digital photo organizer is? Then click here for more info.
How to Transfer Digital Photos directly into photo editing software
Do you know that a typical photo editing software has a menu for transferring digital photos from your camera?
For example, in Adobe Photoshop Elements, click the Connect to Camera or Scanner button on the Welcome Screen.
In other software, it's typically under the File Import menu. Check it out!
Using a memory card reader
You can also try transferring digital photos by using a memory card reader.
The process is almost the same with using USB cable, but instead of connecting your digital camera to the computer. You connect the memory card reader, then insert your memory card in it.
The advantage of this is that you save on batteries, and the photo transfer is faster.
Transferring digital photos from one computer to another
Do you want to transfer digital photos from one computer to another? Then here are some suggestions:
- Connect to a network. Use a network cable to transfer directly to a new folder in the new computer. Drag and drop folders.
- Use CD-Rs (from your previous backups) or CD-RWs so you can reuse them later.
- Use a flash disk if you have one. It functions like a small hard disk.
- If you have zip drives, they can be helpful, too.
- If you have fast internet connection, then upload your photos in the internet. Then download in the other computer.
Basically, any media or method used in transferring files can also be used to transfer digital photos. Pick the one that is most convenient for you.
Return from How to Transfer Digital Photos to the Home Page